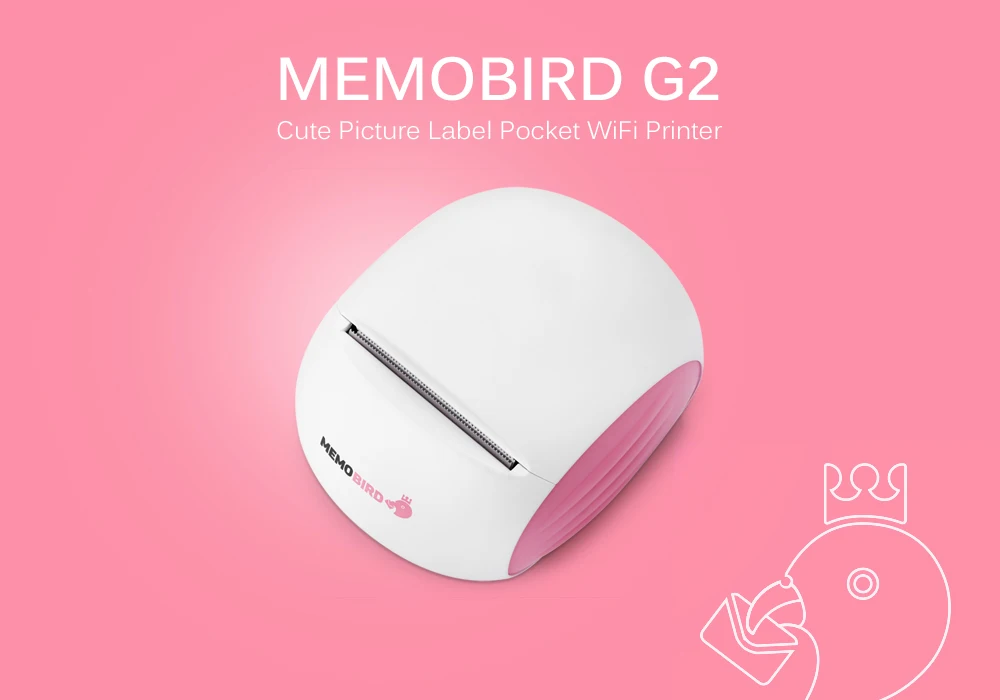
MEMOBIRD G2 Mini Phone WIFI Wireless Thermal Photo Printers
MEMOBIRD G2 Mini Phone WIFI Wireless Thermal Photo Printers
Couldn't load pickup availability
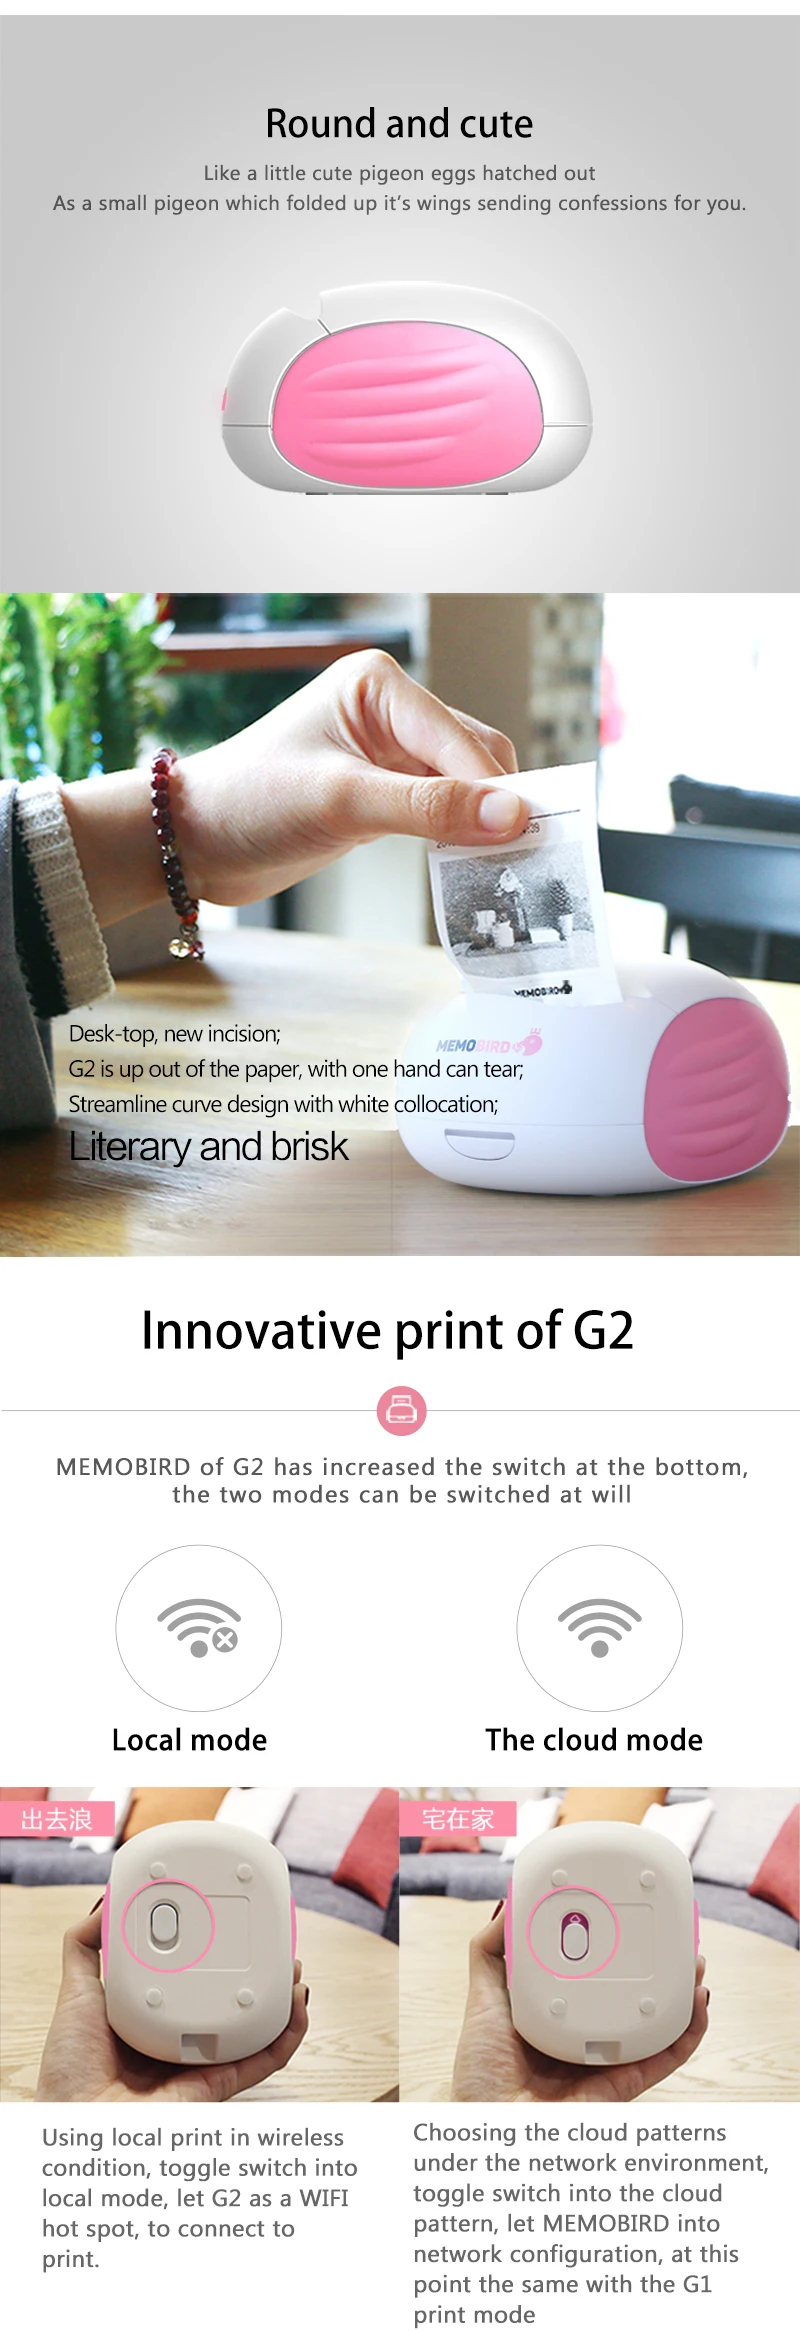
There are two print modes of MEMOBIRD G2 Printer: Cloud Mode and Local Mode.
Cloud mode should be connect with WIFI
Local mode doesn’t need extra WIFI connect, you can use it with the WIFI of this printer, but need to setup in cloud mode when you use it at the first time.
About Cloud Print Mode:
Step 1: Connect with the power, then the printer will show green light.
Step 2: Open the WIFI of your mobile phone.
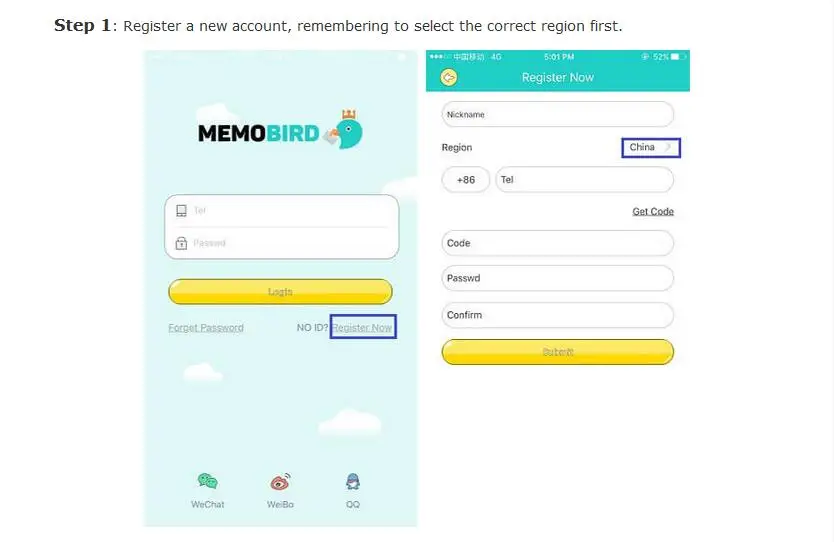
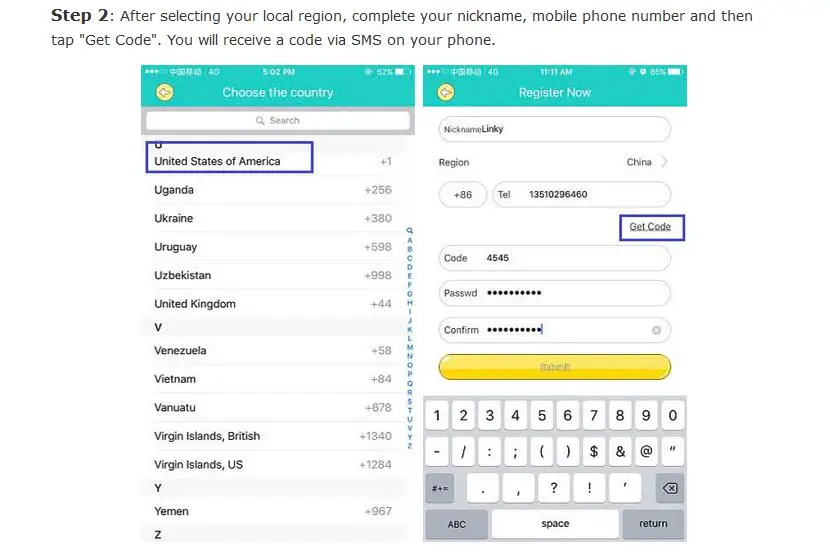
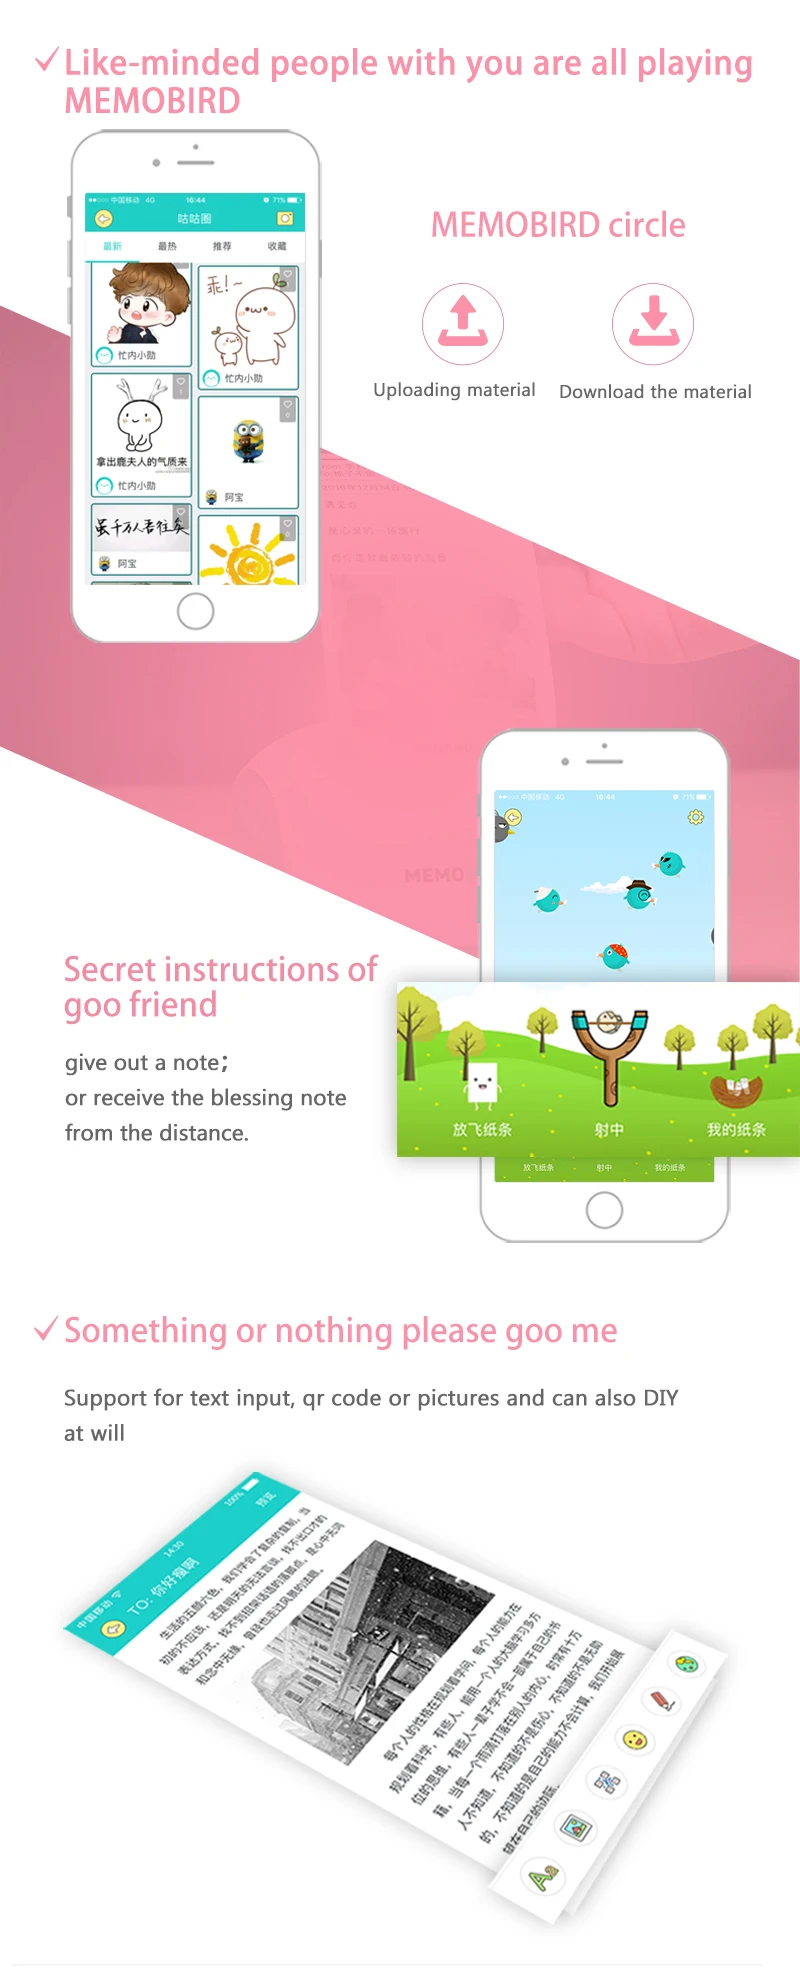
Step 3: Scanning the QR code (on the bottom of this manual) to download the APP, then create a new account.
Step 4: Check the switch on the bottom whether has cloud icon like
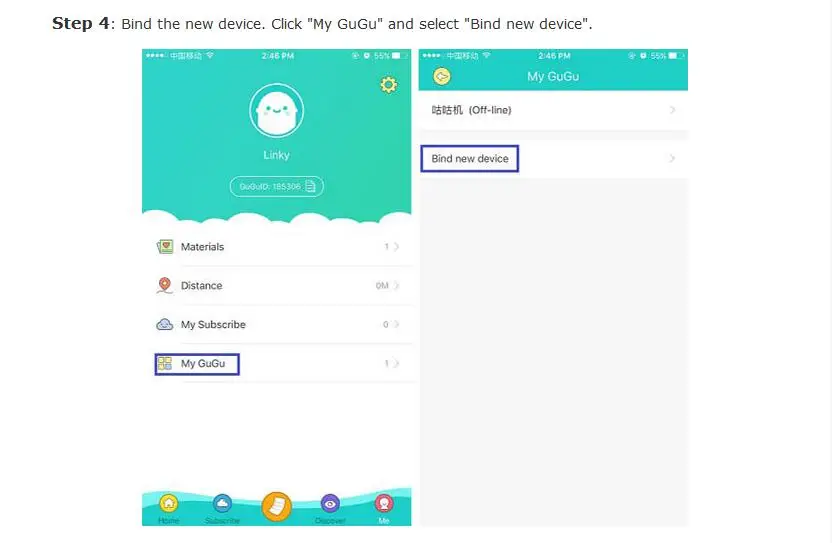
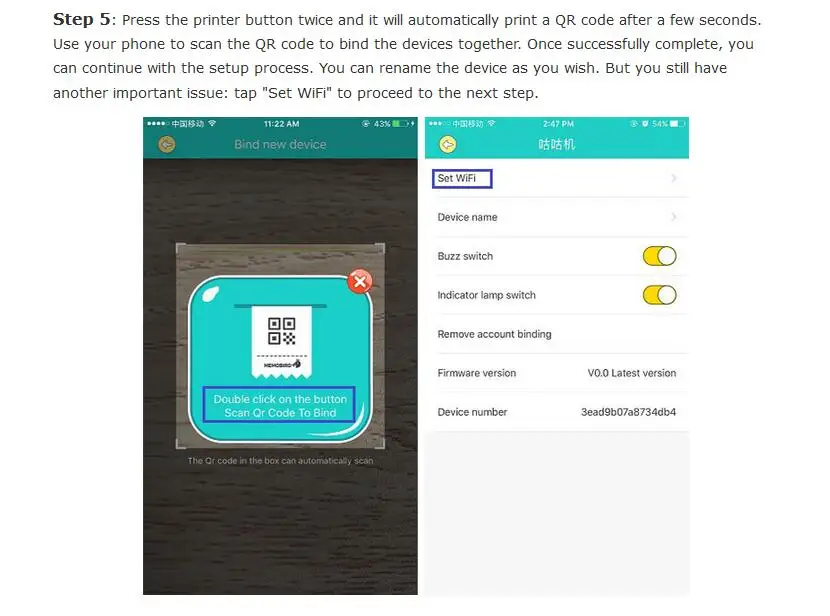
Step 5: Follow the APP prompts, double click the keypad and scanning the QR code to binding the new equipment.
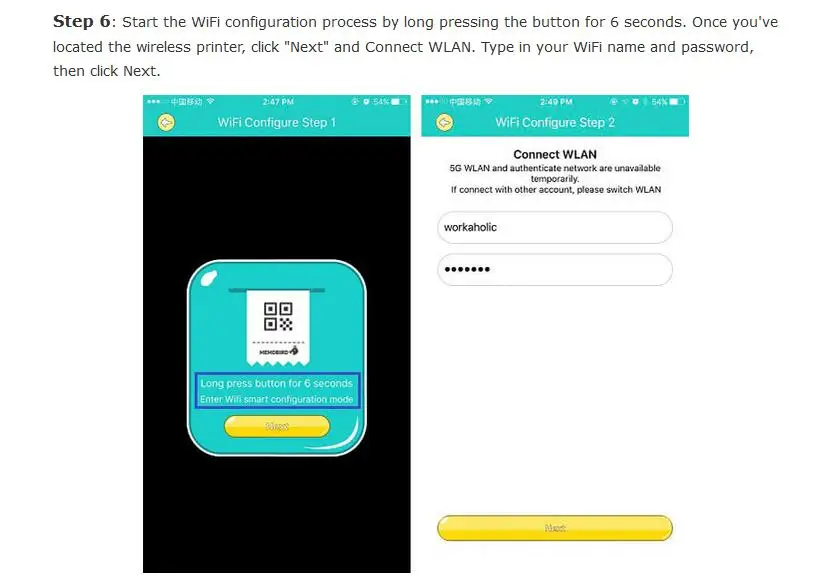
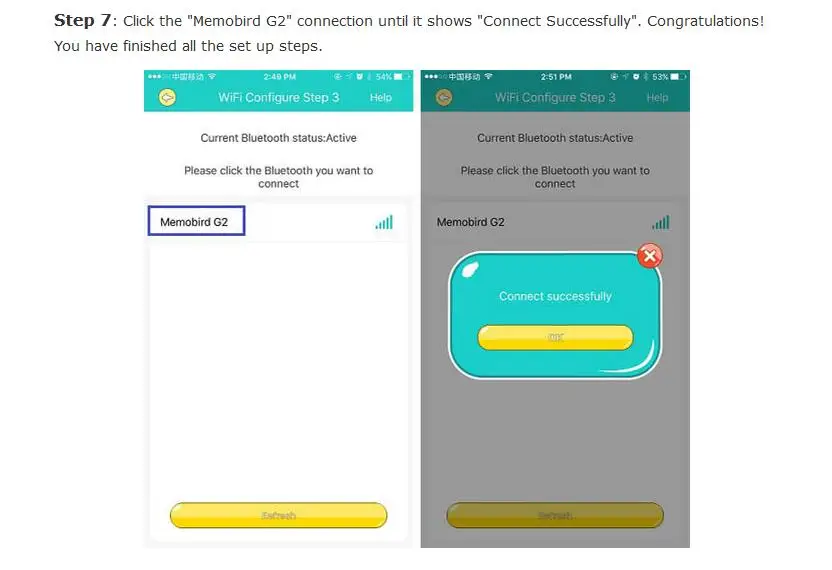
Step 6: Follow the APP prompts, press the keypad 6 seconds to configure WIFI.
About Local Mode:
Step 1: Turn off the bottom switch of MEMOBIRD Printer, make sure there is no cloud icon shown on the device.
Step 2: Follow the prompts of the paper note, then connect with the WIFI of this printer.
. Please use original charger.
. This printer doesn’t support 5G network and authenticate network.
. Please don’t touch the print head and the blade of this printer by
your hands.
. Suggests you to turn off the date traffic when you use Local Mode.
. Double click the key: Print diagnostic report.
. Press the key about 6 seconds: Configure WIFI.
. Bottom switch: Convert cloud mode or local mode.
. Orange Light: Important information (Press the key to resume).
. Red Light: Overheating or out of paper.
. Blue Light: Local mode.
. Green Light (constant): Normal working state.


How to Use Memobird App
